前置作業
前置作業方面,需要先在資料庫中新增使用者數據,並完成使用JDBC進行登入帳密的功能,可以參考
Spring Security(2)使用Spring Security自定義使用者帳密、使用JDBC串接資料庫,然後先新增一筆使用者帳密,並權限設定為ROLE_USER
@EnableGlobalMethodSecurity
@EnableGlobalMethodSecurity這個註解是表示,我們要透過@Securitd, @PreAuthorize,@RolesAllowed這些註解,並透過用戶權限來訪問我們的方法
第一種使用方式:
@EnableGlobalMethodSecurity的用法就是加在配置類中就可以了,當然我們熟悉的@configuration是用來表示此類別是用來設定springboot用的,@EnableGlobalMethodSecurity已經包含了@configuration,所以我們直接在我們繼承WebSecurityConfigurerAdapter的類別上面加上@EnableGlobalMethodSecurity註解即可
@EnableGlobalMethodSecurity
public class SecurityConfig extends WebSecurityConfigurerAdapter {
 //...
}
第二種是用方式:
放在啟動類上面(Application)。
@EnableGlobalMethodSecurity
@SpringBootApplication
public class DemoApplication {

    public static void main(String[] args) {
        SpringApplication.run(DemoApplication.class, args);
    }

}
而如果要使用@Secured、@PreAuthorize、@PostAuthorize,的話都要先開啟註解功能,也就是在我們的@EnableGlobalMethodSecurity加上(Securitd=true)、(prePostEnabled = true)、
舉例:
開啟@Secured功能
@EnableGlobalMethodSecurity(securedEnabled=true)
開啟@PreAuthorize或是@PostAuthorize
@EnableGlobalMethodSecurity(securedEnabled = true,prePostEnabled = true)
如果要同時使用的話,@EnableGlobalMethodSecurity(securedEnabled = true,prePostEnabled = true),就可以了
四種加在方法上的註解
主要是@Securitd、@PreAuthorize最為常用,
所以下面實作中會解釋兩者最大的差別
| Security Annotation (註解) | 使用時機 |
|---|---|
| @Secured | 用戶有某個角色,驗證後進行方法 |
| @PreAuthorize | 在方法執行之前進行驗證,並能將用戶的roles/premission參數傳入到方法中 |
| @PostAuthorize | 在方法執行之後,在進行驗證 |
| @PostFilter | 將方法的返回數值進行過濾 |
| @PreFilter | 將傳入方法的值進行過濾 |
實作
以下實作最常使用到的@Secured以及@PreAuthorize,可以發現@PreAuthorize在設定權限參數中,使用了hasAnyAuthority加入前綴,使權限在資料庫的名稱為ROLE_USER,hasAnyAuthority是spring EL表示式(Spring Expression Language)的一種,@Secured並沒有支援spring EL表示式,且也沒有像@PreAuthorize可以將驗證的參數傳入方法中,所以簡單來說@PreAuthorize就是@Secured的加強版
共同設定、部分程式碼
@EnableGlobalMethodSecurity(securedEnabled = true,prePostEnabled = true)
public class SecurityConfig extends WebSecurityConfigurerAdapter {


    @Autowired
    private DataSource dataSource;

    //使用jdbc來進行用戶登入,固定寫法
    @Override
    protected void configure(AuthenticationManagerBuilder auth) throws Exception {
        String sql="SELECT username,updatepassword,enabled FROM t_user WHERE username=?";
        String authorsql="SELECT username,role FROM t_user WHERE username=?";
        auth.jdbcAuthentication()
                .dataSource(dataSource)
                .usersByUsernameQuery(sql)
                .authoritiesByUsernameQuery(authorsql)
                .passwordEncoder(new BCryptPasswordEncoder());
    }


    @Override
    protected void configure(HttpSecurity http) throws Exception {
    	//http.formLogin().....
    }

    @Bean
    PasswordEncoder password() {
        return new BCryptPasswordEncoder();
    }
}
@Secured
Controller:
@GetMapping("/test")
@Secured("ROLE_USER")
public String test(){
    return ("Secured驗證成功");
}
如果要匿名訪問的話,使用@Secured(“IS_AUTHENTICATED_ANONYMOUSLY”)就可以了,不過不用加應該更快(?
@PreAuthorize
@GetMapping("/test2")
@PreAuthorize("hasAnyAuthority('USER')") //=@PreAuthorize("hasRole('ROLE_USER')")
public String test2(){
    return ("PreAuthorize驗證成功");
}
實際運行
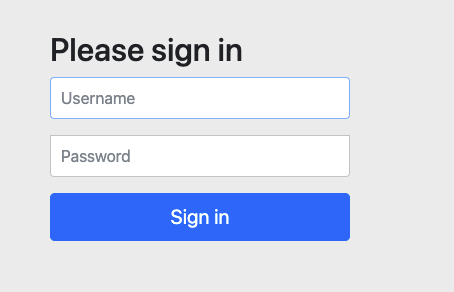
以輸入localhost:8080/test為例,會先出現預設的登入畫面:
接著使用資料庫的帳號密碼進行登入,這裡我分別準備了兩組帳號,
第一組角色ROLE_ADMIN進行登入:
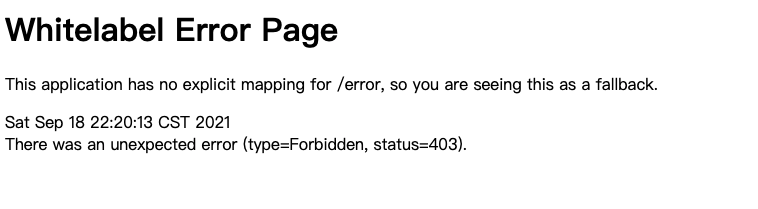
會出現AccessDenied錯誤,雖然登入成功但是被擋住了,
如果是用第二組角色ROLE_USER登入: